
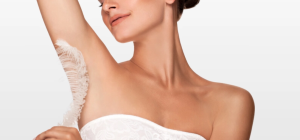
వ్యాక్సింగ్ లేకుండానే అవాంఛిత రోమాలను మాయం చేసే సూపర్ చిట్కా..!అమ్మాయిలను చాలా ఇబ్బంది పెట్టే సమస్యలలో అవాంఛిత రోమాలు కూడా ప్రధానమైనవి. అవాంఛిత రోమాలు అందాన్ని చాలా
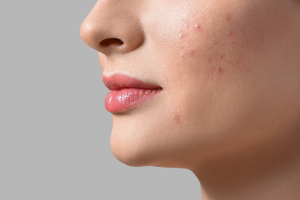
ముఖం మీద మచ్చలను మాయం చేసే సూపర్ టిప్ ఇది..!అందమైన ముఖాన్ని కూడా ఎబ్బెట్టుగా కనిపించేలా చేయడంలో ముఖం మీద మచ్చలు, గీతలు, మొటిమలు చాలా కీలక

శీతాకాలంలో చర్మాన్ని రక్షించే టోనర్.. ఇంట్లోనే ఈజీగా ఇలా చేస్కోండి! శీతాకాలం చర్మాన్ని పొడిగా, గరుకుగా చేస్తుంది. కొన్ని సందర్బాలలో ఇది చర్మాన్ని ఎర్రగా మార్చి చర్మాన్ని

చలికాలం కదా అని ముఖం మీద క్రీమ్స్ పూస్తున్నారా... ఈ షాకింగ్ నిజాలు తెలుసా!చలికాలం చర్మానికి పరీక్ష కాలం. చలి, చల్లగాలి కారణంగా చర్మం పగులుతుంది. చలి


న్యూ ఇయర్, క్రిస్టమస్ హడావిడిలో మిమ్మల్ని తళుక్కున మెరిపించే చిట్కాలు..! డిసెంబర్ నెలను పార్టీ సీజన్ అని చెప్పవచ్చు. ఒకవైపు క్రిస్మస్ వేడకలు, మరొకవైపు న్యూ ఇయర్
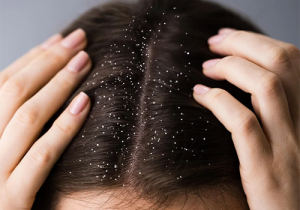
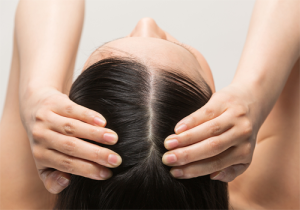
శీతాకాలంలో చుండ్రు పెరుగుతోందా...ఈ మిస్టేక్స్ చేస్తున్నట్టే..! జుట్టు ఆరోగ్యానికి అతిపెద్ద శత్రువు ఏదైనా ఉందంటే అది చుండ్రు. చుండ్రు తల చర్మాన్ని చాలా ఇర్రిటేట్ చేయడమే కాకుండా
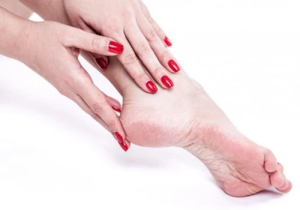
పాదాలు బాగా పగిలి ఇబ్బంది పెడుతున్నాయా... అయితే మీకోసమే ఈ టిప్స్!మహిళలు ఆరోగ్యం కంటే ఎక్కువగా అందానికి ప్రాముఖ్యత ఇస్తారు. జుట్టు, ముఖం, పెదవులు, కనుబొమ్మలు, గోళ్లు

ముఖం మీద మచ్చలను వదిలించుకోవడానికి గ్లైకోలిక్ యాసిడ్ను ఎలా వాడాలంటే..!మచ్చలు లేదా చాలా ఎక్కువగా ఉన్న టాన్ ముఖ చర్మాన్ని చాలా దెబ్బతీస్తాయి. వికారంగా కనిపించేలా చేస్తాయి.
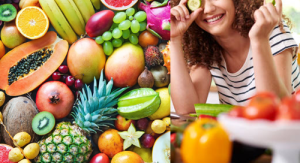
మెరిసే చర్మం కావాలా... ఈ పండ్లు తినండి చాలు..! అందంగా, ఆరోగ్యంగా, మెరుస్తూ కనిపించే చర్మం కావాలని ప్రతి అమ్మాయి కోరుకుంటుంది. అయితే ఇదంతా కలగానే ఉంటుంది.
జుట్టు కుదుళ్లను బలంగా ఉంచే విటమిన్లు ఇవే..! మందంగా, మెరిసే, ఆరోగ్యకరమైన జుట్టు కావాలని ప్రతి ఒక్కరూ కోరుకుంటారు. జుట్టు సంబంధిత ఉత్పత్తులను ప్రమోట్ చేసుకోవడానికి అయినా,
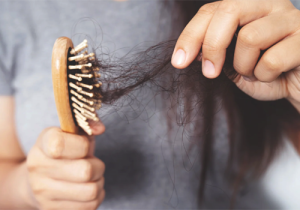
హెయిర్ ను పాడు చేసే రోజువారీ అలవాట్లు ఇవి..!జుట్టు అందంగా, ఆరోగ్యంగా ఉండాలని ప్రతి అమ్మాయి కోరుకుంటుంది. అబ్బాయిలు కూడా జుట్టు గురించి జాగ్రత్తలు తీసుకున్నప్పటికీ అమ్మాయిలకే
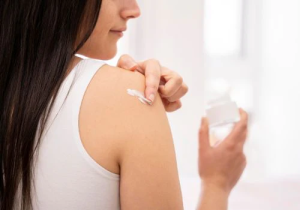
బాడీ లోషన్ సీక్రెట్స్.. పొడి చర్మం ఉన్నవారికి ఏ లోషన్ మంచిది... శీతాకాలం ప్రారంభమైంది. ఇది చర్మానికి పరీక్షలు పెట్టే కాలం. ముఖ్యంగా సున్నితమైన చర్మం, పొడి